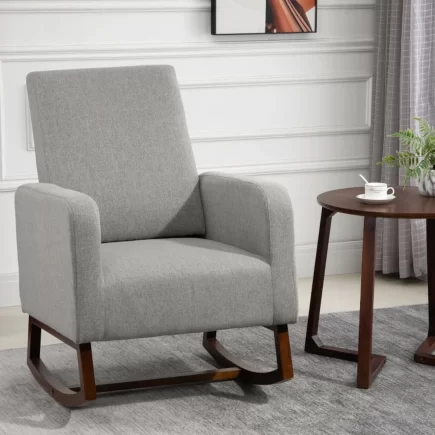
If your recliner seat has started to sag, you know the discomfort it brings. It feels like your favorite spot in the house has betrayed you, offering no more support than a pillow stuffed with air. Sagging recliner seats are a common problem, but the good news is you don’t need to throw your chair away or call a pricey professional repair service. With a few simple tools, materials, and guidance, you can restore your recliner to its former glory. Whether it’s worn-out springs, foam breakdown, or a loose frame, you’ll tackle each issue by yourself.
Identifying the Cause of Sagging

Before jumping into fixing, you’ll want to identify the exact cause of the sagging seat. Lay down a protective sheet and carefully turn the recliner upside down. Use a flathead screwdriver or staple remover to lift the dust cover underneath. This will expose the inner mechanics. Here are some common issues you may find visually:
1. Worn-out Springs
Springs are responsible for maintaining the seat’s shape and support. When one or more springs break or lose their tension, the seat sags. Inspect the underside of the recliner to see if any springs are missing, loose, or damaged.
2. Broken or Compressed Foam
Over time, foam can flatten or break down. A sagging or uneven cushion often indicates that the foam has lost its firmness. If the foam feels thin or compressed, it may need replacement.
3. Loose Frame
If the frame that supports the seat is loose or unstable, it can contribute to sagging. Check for any screws or bolts that have come undone, as this can affect the recliner’s overall stability.
4. Faulty Footrest Mechanism
Sometimes, the footrest can be responsible for the sagging. If the footrest mechanism is out of alignment or the tension is wrong, it can cause additional stress on the recliner’s seat.
Now that you’ve identified the problem, it’s time to tackle the fix. Let’s walk through the steps you need to follow to restore your recliner seat.
Steps of How to Fix a Sagging Seat
1. Replacing or Reinforcing Springs
Springs are integral to the comfort and shape of your recliner. If one or more springs are broken, the seat will sag. The good news is that replacing them is relatively easy and cost-effective.
Materials Needed
- Replacement zig-zag springs
- Spring clips/hooks (if necessary)
- Pliers and a screwdriver
- Gloves for protection
How to Do It
1. Remove the Damaged Springs
- Use pliers to detach the spring from its clips or hooks on both ends.
- Some may be stapled or screwed into the wood frame; remove those carefully.
2. Measure the Spring Length
- Use a measuring tape to determine the length and type of spring to purchase.
- Match it with a similar zig-zag spring from a hardware store or online.
3. Install the New Spring
- Hook one end into place using pliers.
- Stretch it across to the other side and hook it in securely.
- If it’s difficult to stretch manually, use a spring stretcher tool.
4. Reinforce Spring Support (Optional)
- Add zip ties, wire, or heavy-duty twine between springs for added tension
- Recheck spring tightness before moving on.
2. Replace or Add Foam for Cushion Support

Over time, the foam in your recliner can compress, lose its density, or break down, causing the seat to sag. Replacing the foam with new, high-density foam can help restore its original shape and provide firm support. This is one of the most effective solutions to fix sagging caused by cushion breakdown.
What You’ll Need
- High-density foam
- Upholstery batting (optional, for smoothness)
- Serrated or electric knife
- Adhesive spray
How to Do It
1. Remove the Cushion Cover
Carefully remove the cushion cover by unzipping or cutting the fabric if necessary.
2. Inspect the Foam
Check if the foam inside is flattened, broken, or compressed. If it is, it needs to be replaced.
3. Purchase New Foam
Buy high-density foam, memory foam, or foam designed for furniture. High-density foam will provide better support and last longer.
4. Cut the Foam
Use an electric knife or serrated knife to cut the foam to the exact size and shape of the cushion. Make sure to measure the dimensions of the old foam before purchasing the new foam.
5. Rewrap the Foam
Once you have cut the foam to size, wrap it in batting to give it a smooth and cushioned appearance.
6. Reassemble the Cushion
Once the foam is in place, reattach the cushion cover and place it back into the recliner. You should immediately notice a firmer, more supportive seat.
3. Add a Seat Cushion Insert or Support Pad

If replacing the entire foam cushion is too complicated or unnecessary, you can add a support pad or cushion insert to the existing seat cushion. This is a quick and non-invasive way to restore some support and reduce the sagging sensation.
Material Needed
- Pre-made cushion support pad or insert (memory foam, gel, or orthopedic foam)
- Fabric scissors
- Measuring tape
- Optional: anti-slip fabric or Velcro strips
How to Do It
1. Remove the Seat Cushion
Gently lift the cushion from the recliner. Most recliner cushions are not permanently attached and can be removed easily. If they are fixed, skip to Step 2 and insert the support beneath.
2. Measure Cushion Area
Use a measuring tape to find the length, width, and depth of the seat base or cushion pocket where the insert will go.
3. Cut Support Pad to Size
If using a universal support pad (egg crate, orthopedic, etc.), cut it to fit your seat base. Use sharp scissors or a utility knife for clean edges.
4. Insert Pad Inside the Cushion
For zippered cushions, unzip and slide the pad in between the foam and the fabric lining.If the cushion is sealed, place the pad underneath the cushion on top of the seat base.
5. Secure with Non-Slip Backing (Optional)
Use non-slip fabric or velcro strips to hold the pad in place and prevent shifting while seated.
6. Reassemble and Test
Put the cushion back in place and sit down to test the added support. If needed, layer two thinner inserts for customizable firmness.
When to Use This Fix
- Ideal for renters or quick improvements
- Perfect for chairs that just need a little more firmness
- A good interim solution while waiting for replacement parts
This is an excellent solution for those looking for a temporary fix or for users who want to avoid the hassle of complete cushion replacement.
4. Reinforce the Recliner Frame with Additional Support

If the frame beneath the cushion is loose, cracked, or weak, no amount of new foam or springs will fully solve the sagging problem. Reinforcing the base structure can dramatically improve support and extend the life of the recliner.
Tools and Materials
- Drill and wood screws
- Wood glue (optional)
- New wooden slats or 1-inch plywood
- Measuring tape
- Saw (if wood needs cutting)
- Screwdriver
How to Do It
1. Flip the Recliner Over Again
- Lay it on its back and make sure it’s stable. Clear out the workspace underneath.
2. Inspect the Wooden Frame
- Look for any cracked or warped wood, missing support slats, or bent metal parts.
- Push on areas with your hands to test for weak spots.
3. Cut New Wood Supports
- Measure the width between the recliner’s side frames under the seat area.
- Cut slats or plywood to fit this space snugly. For extra strength, use multiple narrow slats instead of one wide piece.
4. Install Wooden Supports
- Place the slats or plywood across the weak area and screw them directly into the side frames.
- If there’s room, use wood glue + screws to ensure a long-lasting bond.
5. Recheck Stability
- Once done, press down on the reinforced area. It should feel firm and not bend under pressure.
6. Reattach Dust Cover (if removed)
- Use a staple gun or upholstery tacks to reattach the fabric panel you removed earlier.
In cases where the seat sagging is due to a weakened or unstable frame (not just the cushions), reinforcing the frame structure can help improve support. This might include adding new crossbars or wooden slats to provide extra stability.
When to Replace Instead of Repair
If your recliner has:
- A cracked frame beyond repair
- Missing major parts you can’t find
- Mold or mildew in the cushions
- Severe rust in the reclining mechanism
It may be time to consider a replacement. In those cases, browse budget-friendly recliners that offer better support and warranties.
Ensuring Long-Term Comfort
To make sure your recliner stays comfortable for years to come, follow these long-term maintenance tips:
- Regularly Check for Loose ScrewsTighten screws and bolts every few months to maintain stability.
- Fluff and Rotate Cushions: Regularly fluff and rotate your seat cushions to prevent uneven wear.
- Lubricate the Recliner Mechanism: Keep the recliner’s moving parts lubricated to prevent friction and extend their lifespan.
Keeping Your Recliner in Top Shape
Fixing a sagging recliner seat doesn’t have to be complicated or expensive. With a little time, effort, and the right materials, you can restore your recliner to its former comfort. Whether it’s tightening loose screws, replacing broken springs, or adding new foam, these are the steps you need for a successful repair to bring your recliner back to life. Also, check out the affordable Recliners options at Aosom.
FAQs
1. Can plywood be used to fix a sagging recliner seat?
Yes, plywood can be placed under the cushion to provide added support and prevent further sagging. It acts as a solid base, restoring firmness to the seat. For extra comfort, consider adding foam on top of the plywood before replacing the cushion.
2. How much does it cost to repair a sagging recliner seat?
Repair costs range from $100 to $400, depending on the issue. Minor repairs like replacing a spring cost $100–$200, while more complex fixes or reupholstery can reach $400 or more. DIY kits are available for $10–$40 for simpler issues.
3. Is the sagging recliner footrest fixed using the sagging seat method?
No, a sagging recliner footrest requires adjusting the spring tension within its mechanism. Unlike seat sagging, which involves adding padding or reinforcing the frame, the footrest fix typically involves repositioning the springs to restore proper support and functionality.


