
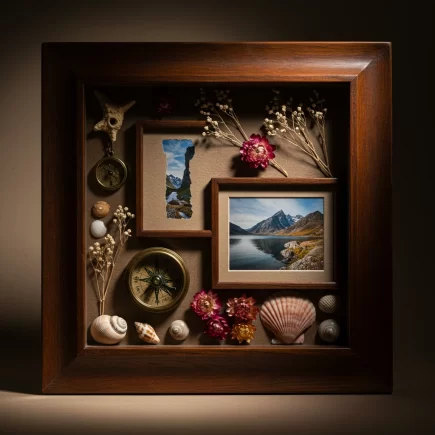


A shadow box frame is more than just wall décor, it’s a way to showcase memories, collectibles, and keepsakes in a secure and stylish way. From displaying military medals to preserving wedding keepsakes or sports jerseys, a shadow box highlights meaningful items while protecting them from dust and damage.

Hanging one may seem intimidating, but with the right tools and a clear step-by-step approach, the process is straightforward. This guide walks you through everything: choosing the correct hardware, installing it safely, and styling your shadow box so it looks professional and lasts for years.
Tools and Materials
Before you start, gather the essentials. Having everything on hand prevents delays and ensures accurate installation.
| Tool / Material | Purpose | Notes |
| Measuring tape | Measure frame and wall placement | Choose one with clear inch markings |
| Pencil | Mark hanging points | Use lightly to avoid stains |
| Level | Keep frame perfectly straight | A laser level offers extra precision |
| Screwdriver | Install screws or anchors | Manual or powered |
| Drill (optional) | For anchors or brick walls | Needed for tough surfaces |
| Stud finder | Locate studs for heavy frames | Crucial for large or solid-wood boxes |
| Hanging hardware | Hooks, anchors, screws, or wire | Select based on weight and wall type |
| Shadow box frame | The item you’re hanging | Lightweight vs. heavy-duty determines method |
Step 1: Attach D-Rings to the Shadow Box
- Place the shadow box facedown on a soft surface to protect the glass.
- Measure about 2–3 inches from the top edge on both sides of the frame.
- Screw in two sturdy D-rings, one on each side, making sure they are level.
Pro tip: Use a screwdriver instead of a drill for better control with delicate frames.
Step 2: Measure and Mark the Wall
- Hold the shadow box against the wall where you want it displayed.
- Mark the top corners lightly with a pencil.
- Use a tape measure to find the distance between the two D-rings.
- Transfer that measurement to the wall and mark the exact hanging points.
- Draw a faint straight line using a level to ensure the marks are perfectly horizontal.
Step 3: Install Wall Hardware
- If you’re hanging on a stud, drill pilot holes and screw in heavy-duty hooks or screws.
- For drywall, drill small pilot holes and insert drywall anchors, then add hooks or screws.
- Make sure the hardware is installed so it aligns with your D-rings.
Step 4: Hang and Level the Shadow Box
- Lift the shadow box and carefully hook the D-rings over the screws or hooks.
- Step back and check that it’s hanging evenly.
- Place a level across the top of the frame to confirm it’s straight.
- Adjust slightly if needed by shifting one side on the hook.
Double-Check Stability
After hanging, test the installation:
- Press gently downward to confirm it won’t slip.
- Check the wire or brackets for slack.
- Make sure the frame sits flush against the wall.
Protecting Walls
Shadow boxes require stronger support than regular picture frames, which can risk wall damage if not done carefully.
- Use only the size of screw or anchor needed.
- Avoid over-tightening, which can strip drywall.
- Add felt pads or bumpers on the back corners of the frame to protect paint and keep it level.
Alternative Hanging Methods
For lightweight or temporary displays, consider:
- Command strips – Hold up to 16 lbs depending on size. Best for renters or temporary décor. Apply to clean, dry walls and let set before hanging.
- Floating mounts – Provide a sleek, hardware-free look with interlocking brackets. Best for medium frames. Require precise leveling.
Hanging on Different Wall Surfaces
| Wall Surface | Best Method | Notes |
| Drywall | Anchors or screws into studs | Anchors if studs aren’t available |
| Brick | Masonry screws or brick clips | Drill into brick, not mortar, for strength |
| Wood | Screws directly into surface | Pre-drill to prevent splitting |
Gallery Wall Arrangements
If hanging multiple shadow boxes, plan a gallery wall for impact.
- Arrange frames on the floor first to test layouts.
- Keep spacing consistent (2–3 inches).
- Use the same leveling method for clean alignment.
A gallery wall works especially well when mixing shadow boxes with standard frames for depth and variety.
Style Tips for Placement
- Hang at eye level (57–60 inches from the floor to the center).
- Center oversized shadow boxes above furniture for balance.
- Give frames space, avoid cluttering.
Maintenance Tips
- Dust the frame and glass regularly with a microfiber cloth.
- Check hardware every few months for loosening.
- Avoid direct sunlight or damp areas to prevent fading or warping.
- Use UV-protective glass for sensitive keepsakes.
Hanging a Shadow Box Frame doesn’t have to be overwhelming. With the right tools, properly rated hardware, and accurate measurements, you can safely display your keepsakes while protecting both your walls and your treasures.
From a single memory box to a curated gallery wall, following these steps ensures your shadow box will remain secure, stylish, and long-lasting.
FAQs
1. What’s the best hardware for hanging a shadow box?
The right hardware depends on your shadow box’s size and weight. Use L-hooks for small frames, D-rings or picture wire for medium ones, and Z-bars for large or heavy boxes needing extra stability and balance.
2. Can I hang a shadow box without damaging my walls?
Yes, you can use removable heavy-duty adhesive strips or brick clips. These provide solid support without leaving permanent holes.
3. Can I hang a shadow box on a door?
Yes, but avoid screws. Use over-the-door hooks or adhesive strips that can support moderate weight without damaging the door.
4. Can LED lights be added inside a shadow box after hanging?
Yes, battery-powered LED strips or puck lights are safe. Install before hanging or choose adhesive lights for easy access.