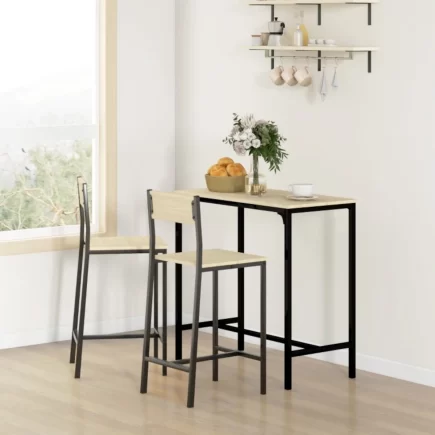
Bar stools are a versatile and stylish seating solution that can elevate your kitchen island, home bar, or dining space. While there are plenty of ready-made stools available, building your own offers something extra: full creative control, affordability, and the joy of crafting something with your own hands.

In this comprehensive guide, we’ll walk you through each step to build a pair of durable and attractive DIY bar stools from scrap oak. Whether you’re a woodworking enthusiast or a hands-on homeowner, this project is both practical and rewarding.
Step 1: Gather Materials and Design Your Bar Stool
Before you touch a saw or hammer, start by preparing your materials and layout.
Materials Checklist
| Material | Purpose |
| Scrap oak wood | Main structure: legs, seat, and support pieces |
| Wood glue (Titebond III) | Strong and waterproof bonding |
| Pocket hole screws | Joining frame pieces together securely |
| Oak plugs | Concealing screw holes for a cleaner finish |
| Polyurethane (semi-gloss) | Protective finish for long-term durability |
Tools Required
| Tool | Function |
| Table saw or circular saw | Cutting stock to size |
| Bandsaw | Shaping angled legs and curves |
| Planer | Flattening uneven boards for the seat |
| Pocket hole jig | Drilling angled screw holes for strong joints |
| Clamps | Holding glued pieces together securely |
| Drill + impact driver | Assembly and fastening |
| Sander and router | Finishing edges and surfaces |
| Measuring tape + pencil | Precise measurements and markings |
Step 2: Create and Assemble the Seat
Seats can be made by gluing multiple boards side-by-side and then planing them flat.
- Cut 4 pieces of oak measuring 17.75″ long, 4.25″ wide, and 0.75″ thick for the seat.
- Apply wood glue to the edges, align the boards, and clamp them tightly using panel clamps or Rockler feet.

- Let it cure overnight, then trim or sand the seat for a clean, even surface.
After the glue cures, use a planer or sander to make sure the top surface is even and smooth.
Step 3: Cut and Prepare the Legs
Front Legs
- Cut two front legs to a height of 30.25” and width of 1.75″ x 1.75″. This is a typical bar stool seat height that works well for standard 42-inch counters.
Back Legs
- Cut two back legs to a height of 41.75 inches and width of 1.75″ x 1.75″ to support the backrest comfortably.
Shape the Back Legs for Comfort
For stools with backrests, the rear legs should be slightly angled for ergonomic support.
Using a bandsaw, taper the tops of the back legs at a slight backward angle. This makes the backrest more comfortable to lean on.
Tip: Save the cut-offs they can be useful for clamping, test pieces, or joining slabs in future projects.
Step 4: Assemble the Bar Stool Using Pocket Holes
Now you’re ready to put the stool together.
- Start by building the two side frames: each includes a front and back leg connected with horizontal support pieces.
- Use a pocket hole jig to drill joints at each end of the support pieces.
- Attach the supports using fine-thread screws (important for hardwood like oak).
- Clamp pieces to ensure alignment and prevent movement during screwing.

- Once both sides are complete, join them with front and back crossbars.
Add a Footrest and Join Supports
- Measure about 6 inches up from the bottom of the legs and attach a footrest. This can be a simple horizontal bar joining the front legs.
- You can use pocket holes or drill straight into the side pieces, depending on the look you want. For a more polished design, fill the screw holes with wood plugs.
- When adding a footrest to your bar stool, it’s important to place it at a consistent height across all stools to ensure a comfortable and uniform user experience.

Attach the Seat to the Stool Frame
- Center the finished seat panel on top of the stool frame. Make sure there is equal overhang on both sides and the front/back if applicable.
- From underneath the stool frame, drill pilot holes upward into the seat panel through the upper side rails.

- Use wood screws to securely attach the seat to the base. Be sure your screw length does not go through the top surface.
- Double-check alignment before tightening the screws to avoid a crooked seat installation.
Step 5: Measure, Cut, and Install the Oak Backrest
Begin by determining the ideal backrest height for your bar stool.
- For most counter-height or bar-height stools, a comfortable backrest rises 12 to 14 inches above the seat surface.
- Use a measuring tape and pencil to mark this height on the inside face of both rear oak legs, ensuring level alignment.
- Next, measure the distance between the two back legs where the backrest will be installed.
- Add about ½ inch to each end if you plan to notch the backrest into the legs for extra stability.
- Once measured, mark your dimensions on a solid oak board and cut it to size using a circular saw or jigsaw.
- Position the oak backrest board so that it’s centered between the legs, matching your marked height.
- Use clamps to hold it in place, then drill pilot holes and countersink each one to allow screw heads to sit flush with the surface.
- Finally, secure the backrest using fine-thread wood screws, which are ideal for hardwood like oak.
- Drive the screws in evenly, being careful not to over-tighten and risk splitting the wood. Once installed, give the entire structure a light sanding to smooth transitions between the legs and backrest before applying any finish or stain.

Step 6: Plug and Conceal Pocket Holes
- Exposed pocket holes can be filled with pre-cut oak plugs. Apply a small dab of glue to the plug and insert it into the hole. Once dry, sand flush with the surrounding surface.
- For holes underneath the seat (not visible), you can skip this step if you want to save time.
Step 7: Rout the Edges for a Finished Look
Rounding over the seat edges adds comfort and a professional look. Use a handheld router with a round-over bit to soften all high-contact surfaces, especially:
- Seat edges
- Backrest edges
- Footrest tops
Routing Direction Tip
Not sure which direction to move the router? Try this:
- Make a finger gun with your thumb over the wood surface.
- Whichever direction your index finger points, that’s the direction to move the router for best results.
Step 8: Apply Finish for Protection and Shine
Sand with 220-Grit Sandpaper
For the best results, begin by sanding all surfaces with 220-grit sandpaper. This ensures a smooth, clean surface that’s ready to accept the finish evenly.
Use a Clean Brush
When applying the polyurethane, always use a clean, high-quality brush. This helps prevent streaks and keeps dust or debris from getting trapped in the finish.
Apply 2–3 Coats
Choose a polyurethane colour that matches your placement theme. Apply two to three thin coats of semi-gloss polyurethane, lightly sanding between each coat to ensure good adhesion and maintain a smooth, even texture throughout.

Building your own Bar Stools isn’t just about saving money, it’s about expressing your personal style and enjoying the process of creation. From selecting the wood to applying the last coat of finish, each step brings you closer to a truly custom piece of furniture.
FAQs
1. How do I ensure the Bar stool legs are level and wobble-free?
Use a flat surface during assembly, check with a level, and measure diagonals for squareness. If needed, sand the bottom of legs or add adjustable feet.
2. What’s a safe weight capacity for DIY wood bar stools?
With quality hardwood and strong joinery like pocket screws and glue, your stool can safely support 250–300 lbs when built properly.
3. How can I give my bar stools a rustic or distressed look?
Use distressing tools like chains, wire brushes, or a hammer to mark the wood. Finish with a dark glaze or antiquing wax to highlight imperfections and texture.


