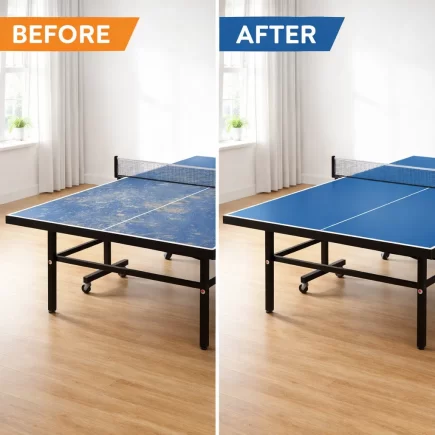
Whether you’re a weekend DIYer, a savvy home decorator, or just someone looking to give an old piece of furniture new life, refinishing an end table is a satisfying, beginner-friendly project with big visual payoff. With the right steps, materials, and techniques, you can transform a scratched, faded, or outdated end table into a fresh, modern centerpiece for any room.

This in-depth guide breaks it all down for you from evaluating materials to choosing your finish and beyond. You’ll also find helpful tables, cost-saving tips, and product recommendations.
Assessing the Table’s Material: Solid Wood vs. Veneer vs. MDF
Before you dive into refinishing your end table, it’s essential to understand the type of material you’re working with. This affects everything from sanding to how well the table will absorb stain or paint.
Solid wood
Solid wood is the gold standard when it comes to refinishing. It’s durable, features a natural wood grain, and can handle deeper sanding, stripping, and repeated refinishing.
Wood veneer
On the other hand, is a thin slice of real wood applied over a base material like MDF or particleboard. Veneer can still be refinished, but it requires a more delicate approach. Light sanding is usually okay, but too much pressure can wear through the thin top layer, revealing the cheaper substrate underneath.
MDF
Medium-density fiberboard, is a smooth, engineered wood product that’s made from wood fibers and resin. While MDF is affordable and often found in budget furniture, it’s not suitable for staining because it lacks wood grain.
Tools and Materials You’ll Need
Here’s a comprehensive checklist for what you’ll need to refinish your end table.
- Sandpaper (60 to 220 grit)
- Orbital or palm sander (optional)
- Chemical stripper (gel preferred)
- Wood filler or putty
- Wood conditioner (optional)
- Wood stain or furniture paint
- Protective finish (poly, wax)
- Brushes, foam applicators
- Tack cloth or microfiber rags
- Safety gear (gloves, goggles)
Step 1: Clean the Surface Properly
Before sanding or stripping, thoroughly clean the surface:
- Use dish soap and water for general grime
- Use Degreaser for greasy spots
Use a sponge, rinse, then dry with a lint-free cloth. Any leftover oils or waxes can interfere with sanding and finishing.

Step 2: Apply Sanding
You can smooth the surface with a few passes of sandpaper.
Mechanical Sanding

When using a power sander to refinish an end table, start with medium-grit sandpaper and gently move in the direction of the wood grain. Let the sander do the work, don’t press down.
Always keep the sander moving to avoid uneven spots. If your table has veneer, use light pressure and avoid over-sanding. Finish with fine-grit paper for a smooth surface.
Step 3: Repairing Scratches, Chips, and Loose Parts
Before you move on to painting or staining, it’s a good idea to repair any damage to the table so it looks and feels solid and smooth.
For Scratches, Chips, and Cracks
If your table has deep scratches, small holes, or cracked corners, use wood filler or wood putty to fix them.
- Scoop a little filler onto a putty knife and press it into the damaged spot.

- Let it dry completely (check the label for drying time).
- Once dry, sand it gently until it’s smooth and level with the rest of the surface.
This will help your finish look clean and even when you’re done.
Fix Loose Legs or Wobbly Drawers
- Apply wood glue to any loose joints and clamp them tightly until the glue dries. Clamps help hold everything in place while it sets.
- To fix loose drawers, start by checking the screws inside the drawer frame. Use a screwdriver to tighten any that have come loose. If the holes are worn out, apply wood glue and insert wooden dowels or toothpicks before re-screwing to ensure a snug, long-lasting fit.
Step 4: Pre-stain Wood Conditioner (Conditioning Tips)
Before staining, applying a quality pre-stain wood conditioner ensures your table absorbs colour evenly for a flawless finish. This simple step prevents blotches, enhances grain beauty, and extends the life of your furniture makeover, giving your table a professional, showroom-worthy appearance that elevates any room.
Apply Pre-Stain Conditioner First
Brush on a pre-stain wood conditioner before staining. It helps the wood absorb stain evenly and prevents patchy or blotchy spots from forming during the process.
Best for Softwoods and Uneven Grain
Use it especially on softwoods like pine or wood with mixed grain patterns. This step gives your finish a smoother, more consistent look across the entire surface.

Step 5: Applying Stain or Paint: Application Tips & Techniques
For Paint
Start by applying a thin, even coat of paint using a foam roller for flat surfaces or an angled brush for edges and corners. Avoid thick layers to prevent drips. Once the first coat is dry, lightly sand it with fine-grit sandpaper to remove bumps or brush marks. Wipe off any dust, then apply a second coat. Repeat this process until you get a smooth, clean finish.

For Stain
To stain wood, use a foam brush or a lint-free cloth to apply the stain evenly. Let it soak in for 5 to 15 minutes longer wait times will result in a deeper, richer color. Then, wipe off the excess using a clean cloth, always going in the direction of the wood grain. Depending on how dark you want the finish, you can apply a second coat after the first one dries.
Refinishing an End Table is a rewarding DIY project that can breathe new life into tired furniture and elevate your home’s style. With the right preparation, tools, and techniques, you can transform a worn piece into a polished, functional statement.
FAQs
1. Do I need to use both a sander and a stripper on the End Table?
Not necessarily. If the old finish is light or flaking, sanding may be enough. Thick or glossy finishes often require a chemical stripper first, followed by light sanding.
2. What’s the difference between wood filler and wood putty?
Wood filler is better for raw wood and can be sanded and stained. But Wood putty is flexible and best for small cosmetic fixes usually used after staining or painting.
3. Can I use spray paint instead of brushing on the end table?
Yes, spray paint offers smooth on end tables, even coverage especially for legs or intricate details but always use it in a well-ventilated area and apply multiple light coats to avoid drips.

