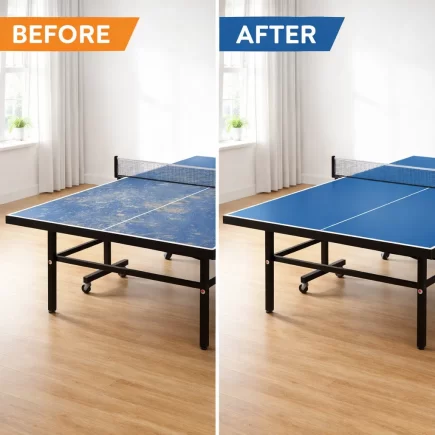
A dining room table is more than a piece of furniture. It’s where meals are shared, stories are told, and memories are made. But over time, even the most beautiful tables can become scratched, dull, or discoloured. Instead of replacing a perfectly functional table, refinishing it can give it a fresh new look that suits your current style and preserves its value.

Whether your goal is to restore a family heirloom or breathe new life into a thrift store find, this expert guide walks you through the entire refinishing process.
Tools & Materials Checklist for a Successful Project
Before diving into refinishing, gather all the tools and materials you’ll need. Having everything on hand will streamline the process and help you avoid delays.
| Category | Items |
| Safety Gear | Gloves, dust mask or respirator, eye protection |
| Cleaning | Mild soap, warm water, tack cloths, microfiber cloths |
| Stripping | Chemical stripper, chip brushes, plastic scraper, steel wool |
| Sanding | Orbital sander, sanding block, sandpaper (80, 120, 220 grit) |
| Repairs | Wood filler, putty knife |
| Staining | Wood conditioner, wood stain, clean rags or foam brushes |
| Sealing | Polyurethane, shellac, lacquer, varnish, paintbrush or foam applicator |
Setting Up a Safe, Functional Workspace
Refinishing is messy, dusty, and involves strong-smelling chemicals. That’s why creating a safe workspace is critical.
- Protect Surfaces: Use drop cloths or cardboard under the table to catch drips.
- Raise the Table: Set the table on sawhorses or bricks to avoid back strain.
- Lighting: Good lighting is essential for spotting drips, streaks, or missed spots.
Make sure children and pets stay away from the workspace while you’re working.
Cleaning the Table Before Refinishing
Before stripping or sanding, it’s important to clean the dining table thoroughly. Dirt, grease, and polish residues can interfere with the refinishing process.
Steps to Clean the Dining Table
- Use a soft cloth to wipe down the entire surface, including corners and legs.
- Wipe the surface with a tack cloth to remove any dust or particles.

Step-by-Step: Stripping the Old Finish Safely
There are two main ways to remove an old finish: sanding or using a chemical stripper. Chemical strippers are especially effective for intricate carvings or thick finishes.

How to Use a Chemical Stripper
- Wear safety gloves, a respirator, and eye protection.
- Apply the stripper with a chip brush in a thick, even layer.
- Let it sit for 10–20 minutes (or as directed).
- Scrape off the bubbled finish using a plastic scraper.
- For grooves and corners, use steel wool dipped in stripper.
- Neutralize the surface with water or mineral spirits.
- Allow the table to dry for 24 hours before sanding.
Stripping vs. Sanding: Pros and Cons
| Method | Pros | Cons |
| Chemical | Less physical effort, better for details | Fumes, messier, requires neutralization |
| Sanding | No chemicals, cleaner process | More time-consuming, risks over-sanding |
Sanding Like a Pro: Grit Progression and Grain Direction
After stripping, sanding is essential to remove leftover finish and smooth the surface.
Sandpaper Grit Guide
| Grit Level | Purpose |
| 80 | Removes heavy finish or rough patches |
| 120 | Smooths scratches left by coarse grit |
| 220 | Prepares surface for staining/sealing |
Sanding Tips
- Always sand with the wood grain.
- Use an orbital sander for large flat areas.
- Use sanding blocks or hand sanding for curves and legs.
- Wear a mask to avoid inhaling wood dust.
Sanding can be time-consuming but is key to getting a smooth, professional finish.

Repairing Damage: Scratches, Dents, and Veneer Challenges
Once the surface is stripped and sanded, inspect for damage.
Fixing Deep Scratches and Dents
- Apply matching wood filler with a putty knife.
- Slightly overfill the area.
- Let it dry completely (usually a few hours).
- Sand flush with 120 and then 220 grit sandpaper.
Special Note for Veneer Tables: Be very cautious when sanding veneer. Use only fine grit sandpaper and avoid lingering too long in one spot.
Applying the Stain: Methods for Even, Blotch-Free Results
Staining enhances the natural grain and gives your table its personality.
Types of Wood Stains
| Stain Type | Characteristics |
| Oil-Based | Rich finish, slow drying, more forgiving |
| Water-Based | Fast drying, low odor, eco-friendly |
| Gel-Based | Thicker, great for vertical surfaces and even tones |
Steps to Apply Stain
- Apply wood conditioner if using softwood or mixed wood types.
- Stir (don’t shake) the stain.
- Apply evenly using a rag or foam brush, working with the grain.

- Wipe off excess after a few minutes.
- Let dry fully (usually 24 hours).
- Apply additional coats as needed for depth.
Sealing the Finish: Polyurethane, Shellac, and Alternatives
Once you’ve chosen a finish, here’s how to apply it properly:
How to Apply Polyurethane
- Stir gently before use.
- Apply thin, even coats using a high-quality brush.
- Let dry for at least 24 hours.
- Lightly sand with 400 grit sandpaper between coats.
- Wipe with a tack cloth.
- Repeat for 2–3 coats.
You can also buff the final coat for a satin or matte finish once it cures.
Dry Time: How Long is Enough
After you’ve applied the final topcoat to your Dining Table, the surface may feel dry within a few hours but that doesn’t mean it’s ready for use. Different finishes have varying curing timelines.
For example, oil-based polyurethane is typically touch-dry within 4 to 8 hours, but needs about 24 hours before recoating and anywhere from 7 to 30 days to fully cure. Water-based polyurethane dries to the touch in roughly 2 hours, can be recoated after 4 to 6 hours, and generally cures in about 7 to 10 days.
Refinishing a dining table is a rewarding project that blends craftsmanship with creativity. By following the proper steps of cleaning, stripping, sanding, staining, and sealing you can transform a worn table into a stunning centrepiece that reflects your personal style. It’s more than a surface makeover; it’s about preserving the history and extending the life of a cherished piece.
FAQs
1. Can I refinish a table indoors if I don’t have a garage or outdoor space?
Yes, but you’ll need excellent ventilation. Use fans and open windows to ensure airflow, and choose water-based or low-VOC products to reduce fumes.
2. Can I change the colour of dark wood to a lighter finish?
Yes, but it’s more challenging. You’ll need to completely strip and sand the surface down to bare wood. Keep in mind that some dark woods have natural undertones that may still show through lighter stains.
3. How do I remove brush marks from the topcoat?
Brush marks can be minimized by using high-quality synthetic brushes, applying thin coats, and lightly sanding between layers. You can also switch to a foam brush or wipe-on finish for smoother application.

