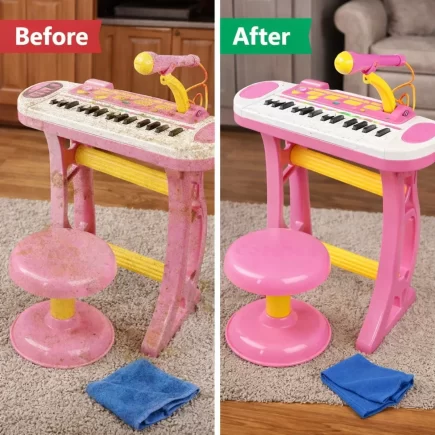
Transforming the look of your bedroom doesn’t have to involve buying new furniture. One of the easiest and most cost-effective ways to breathe new life into an old bed frame is by giving it a fresh coat of paint.

This DIY project not only rejuvenates your space but can also extend the lifespan of your bed frame. With the right materials and a bit of patience, you can turn a dull bed into a beautiful centerpiece. Here’s how you can paint your bed frame and make it look brand new.
Essential Tools Needed for Painting a Bed Frame
- Paintbrushes: Ideal for detailed areas and broad surfaces.
- Paint Roller: Perfect for quick, even coverage on larger areas.
- Spray Paint (Optional): Quick and smooth application, especially for metal frames.
- Painter’s Tape: Masks off areas to protect from unwanted paint.
- Drop Cloths: Protect the floor and surrounding furniture.
- Sandpaper: Smooths surface and preps for painting.
- Cleaning Supplies: Remove dust and grime before painting.
- Primer: Ensures paint adhesion and a smoother finish.
- Protective Gloves: Keep hands clean and protected from chemicals.

Step 1: Prepare the Bed Frame
1. Remove All Bedding and Accessories
Before starting, make sure your bed is completely stripped down. Remove all sheets, blankets, pillows, and any other bedding or accessories. This will give you a clean workspace and ensure no paint gets on the fabric.
2. Disassemble If Necessary
If your bed frame can be disassembled, do so. Remove any slats, rails, or the headboard. This will make it easier to reach every part of the frame, ensuring a more even and thorough paint job.
3. Clean the Surface
Before applying any paint or primer, clean the frame. Dust, dirt, and oils can prevent the paint from adhering properly. Use a cloth or a vacuum to wipe down all surfaces, especially hard-to-reach areas. If the frame is very dirty, consider using a mild soap and water solution, but be sure to dry it completely afterward.
4. For Metal Bed Frames
Metal frames can accumulate dust and grime in joints and under the bed, so ensure these areas are cleaned thoroughly to prevent any rust from forming. If your metal frame has rust spots, use a rust remover or lightly sand the affected areas before proceeding to avoid paint adhesion problems.
Step 2: Sand the Bed Frame
1. Smooth the Surface
Sanding is essential to ensure a smooth surface for painting. Lightly sand the frame to remove any old paint, rough patches, or imperfections. This will help create an even base for the new paint to adhere to.
2. Focus on Peeling Paint
If the frame has areas where the paint is peeling or chipped, spend extra time sanding those spots. The goal is to smooth out these areas so the new paint will apply evenly, preventing noticeable bumps or streaks.
3. For Metal Bed Frames
When sanding a metal frame, use fine-grit sandpaper to avoid scratching the surface too deeply. If rust has formed on the metal, ensure the sandpaper removes it completely to prevent further corrosion under the new paint. Metal is more prone to rust, so sanding it properly is essential.
Step 3: Prime the Bed Frame
1. Apply a Primer
Once the frame is clean and sanded, it’s time to apply primer. Primer helps the paint adhere better, creating a smooth surface and providing extra durability.
Choose a primer that’s compatible with your bed frame’s material,wood or metal. For wood frames, an oil-based primer is often recommended, while metal frames typically do well with a rust-inhibiting primer. Let the primer dry completely before proceeding.
2. Allow Time to Dry
After applying the primer, give it plenty of time to dry. Follow the drying instructions on the primer can, as drying times may vary. This is a crucial step, painting over an insufficiently dried primer can lead to smudging and uneven paint coverage.

Step 4: Choose the Right Paint
1. Select a Paint Suitable for the Material
Choosing the right paint is essential for a lasting finish. For wood bed frames, use high-quality furniture paint designed for wood surfaces. For metal frames, select a paint that’s specifically made for metal. Chalk paint is also a popular option if you’re aiming for a vintage or distressed look.
If you’re using spray paint for a metal frame, be sure to select a paint specifically formulated for metal surfaces to prevent chipping and fading over time. Metallic finishes can also work well if you’re aiming for a sleek, industrial look.
2. Pick the Right Finish
Consider the finish you want: matte, satin, or gloss. A matte finish offers a soft, modern look, while satin gives a slightly more reflective sheen. Gloss finishes are the most durable and easy to clean but can show imperfections more easily. Choose a finish based on your style preference and the durability you need.
3. Test Color Samples
Before committing to a color, test a small patch of paint on an inconspicuous area of the bed frame. This will help you see how the color looks once applied, especially under different lighting conditions.
Step 5: Paint the Bed Frame
1. Use a Brush or Roller
Start painting the bed frame using a brush or roller, depending on the size of the frame and your personal preference. Use even strokes to avoid drips or streaks. If you’re using a brush, apply the paint in long, smooth strokes, making sure to cover all areas.

2. Apply Multiple Coats
In most cases, you will need to apply more than one coat of paint. Wait for each coat to dry completely before applying the next one. This will ensure even coverage and prevent the previous coat from being disturbed by the new layer.
3. For Metal Bed Frames
Metal frames may require additional coats due to their smooth and often non-porous surface. Be sure to allow each coat to dry fully before applying the next to avoid drips and streaks.
4. Pay Attention to Details
Don’t forget the hard-to-reach areas. Paint the undersides, joints, and corners of the frame to ensure a consistent finish all around. Use a small brush for detailed spots.
Metal frames often have intricate details and joints, so use a small brush for these areas to ensure a smooth, even application. If you’re using spray paint, make sure to keep the can at a consistent distance to avoid uneven coverage.
Step 6: Allow the Paint to Dry and Cure
- Let the Paint Dry
Allow the bed frame to dry fully after the final coat, following the paint manufacturer’s instructions. Paint may dry to the touch in hours but takes 24–48 hours to cure. Avoid reassembly until fully set. - For Metal Frames
Metal surfaces may need extra curing time. Be patient for a durable, long-lasting finish.
Step 7: Reassemble and Add Finishing Touches
Once the paint is completely dry and cured, carefully reassemble the bed frame. Reattach any slats, rails, and headboards that you removed earlier. Be gentle while handling the frame to avoid damaging the fresh paint.
Add Decorative Touches
For an extra touch of personalization, consider adding decorative hardware, such as new knobs or pulls, to the frame. You can also apply a clear protective coat to give the bed frame a glossy finish and added durability. This extra layer will also help protect the paint from scratches and wear.
Enjoy Your Newly Painted Bed Frame
Painting a Bed Frame, whether wood or metal, is a simple and affordable way to refresh the look of your bedroom. With the right materials and a little patience, you can achieve a professional-looking result that adds style and longevity to your bed.
It’s a rewarding project that allows you to personalize your space and create a fresh focal point for your room. Whether you choose a bold color, a soft pastel, or a vintage distressed look, painting your bed frame gives you the chance to get creative and make your bedroom truly your own.
FAQs
1. Can I paint a bed frame without removing the old paint?
It’s possible to paint over old paint, but sanding is essential to remove rough patches, peeling, or chipped areas. This ensures that the new paint adheres properly and provides a smooth, even finish.
2. What should I do if the paint is chipping off the bed frame after a few months?
If paint starts to chip off, it may be due to insufficient surface preparation or humidity. Lightly sand the affected areas, reapply primer, and repaint for a durable finish. Always allow ample drying time between coats.
3. Can I paint a bed frame outdoors?
It’s best to paint your bed frame indoors or in a controlled space to avoid dust and bugs sticking to the wet paint. If you do paint outdoors, choose a day with mild temperatures and low humidity for the best results.


