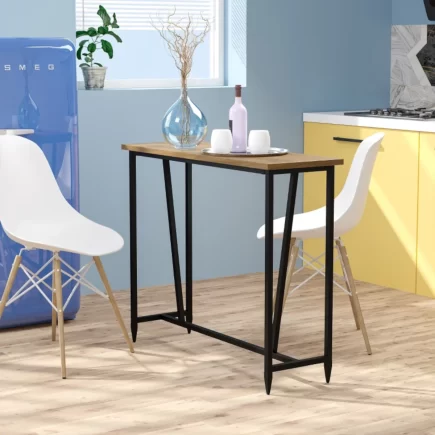
Assembling your handcrafted 3-drawer bedside table can be a rewarding task when you have all the right parts and tools. A solid, well-assembled bedside table not only enhances the look of your bedroom but also provides lasting utility.

Before you start the assembly, it’s important to ensure you have everything you need to make the process efficient and safe. To ensure a smooth assembly, this process is recommended for two adults. A clean, open workspace will also make it easier to work, so make sure to prepare your assembly area by clearing any clutter or obstructions.
Parts and Hardware
Parts:
- Bedside Top (A) – 1 unit
- Legs (B) – 2 units

Hardware:
- Knobs – 3 units
- Machine Screws – 3 units
- Bolts – 5 units
- Washers – 5 units
- Allen Wrench – 1 unit
- Screwdriver – 1 unit (not provided)
- Hammer – 1 unit (not provided)
- Power Drill – 1 unit (not provided)
- Brackets – 2 units
- Wall Plug Screws – 4 units
- Wall Plugs – 4 units
- Restraint Strap – 2 units
Before starting, take the time to familiarize yourself with the parts list to ensure everything is accounted for. This simple step will save you time and frustration during the assembly process.

Step-by-Step Assembly:
Step 1: Install the Knobs on the Drawers
Start by laying the Bedside Top (A) flat on a clean, soft surface like packing foam. This will help protect the wood surface from scratches or damage.
Using a screwdriver, attach a knob to each drawer. These knobs are pre-drilled for easy installation. Simply align the knobs with the drilled holes and secure them by turning the screw into place. Repeat this step for all three drawers.

Tip: Make sure the knobs are evenly aligned to create a visually appealing finish.
Step 2: Attach the Legs to the Bedside Top
With the help of another person, carefully flip the Bedside Top (A) face down. Place it on a padded surface to prevent any scratches.
Next, align each Leg (B) to the corresponding holes on the Bedside Top (A). Use the provided bolts, washers, and the Allen wrench to secure each leg to the top. Tighten the bolts until the legs are firmly attached.

Note: It’s crucial to install the legs tightly to ensure stability. Do not over-tighten, as this can damage the wood.
Step 3: Flip the Bedside Table
Once both legs are securely attached, carefully flip the Bedside Table to an upright position. It’s a good idea to have a second person assist in this step to avoid damage to the table or injury.

Ensure the table is stable and evenly positioned before moving on to the next steps.
Tipover Restraint Installation
To prevent the bedside table from tipping over, especially if you have children or pets, we recommend securing the table to the wall. This step is an important safety feature.

Step 4: Drill Holes for the Brackets
Using the power drill, drill two holes on the wall where the brackets will be installed. The holes should be at the same height as the brackets on the Bedside Top (A).
To make sure the holes are drilled at the correct height:
- Place the Bedside Table against the wall, where you plan to secure it.
- Use a measuring tape to mark the drilling points at the same height as the brackets on the table.

Tip: Always make sure to drill into a solid, load-bearing wall to ensure the stability of the installation. A stud finder can help you locate the studs.
Step 5: Install Wall Plugs and Brackets
Once the holes are drilled, insert the wall plugs into the drilled holes using a hammer. This will help anchor the screws securely into the wall.
Now, attach the brackets to the wall plugs using the provided wall plug screws and a screwdriver. Ensure the brackets are tightly secured in place.

Step 6: Secure the Bedside Table to the Wall
Now that the brackets are installed on both the wall and the Bedside Table, align the table with the wall brackets.
Pull the provided restraint straps through both the brackets. Once aligned, tighten the straps to secure the table firmly to the wall.

Tip: Make sure the restraint straps are securely tightened to prevent the table from tipping over.
Finishing Touches
With everything assembled and secured, take a step back and check that the Bedside Table is stable and all components are tightly fastened. Once the restraint straps are tight, your bedside table is ready for use.
Care and Maintenance Tips
To ensure that your Handcrafted 3-Drawer Bedside Table remains in great condition, follow these simple care tips:
- Floor Protection: Place furniture pads on the bottom of the legs to protect your floor from scratches and scuffs.
- Cleaning: Clean your table regularly with a damp cloth and mild soap solution. Avoid harsh chemicals or abrasive cleaners as they can damage the finish.
- Avoid Heat and Sunlight: Don’t place hot items directly on the furniture, and avoid placing it in direct sunlight to prevent fading or warping.
- Indoor Use Only: This furniture is designed for indoor use. Keep it away from heat sources such as heating vents or fireplaces.
The Handcrafted 3-Drawer Bedside Table is not only a functional piece of furniture but also an elegant addition to any bedroom. By following the assembly instructions carefully, you’ll ensure a stable and lasting setup that enhances your bedroom’s style. Take care to follow the safety guidelines and maintain the table with proper care to ensure its longevity and beauty.
You can also download the Handcrafted 3-Drawer Bedside Table Manual(PDF).
FAQs
1. What should I do if I’m missing a part from the assembly kit?
If you’re missing a part, contact Aosom’s customer support. They should be able to send a replacement part free of charge. Always double-check your parts list before starting the assembly to minimize this issue.
2. How do I secure the bedside table if I don’t want to drill into the wall?
If you don’t want to drill, consider using furniture safety straps with adhesive backing. These are available in hardware stores and can offer a safe, non-invasive alternative to wall anchoring.
3. What should I do if the drawer doesn’t slide smoothly?
Check for obstructions or misaligned tracks first. If clear, apply a thin layer of furniture wax or silicone spray directly onto the slides, rollers, or glides. Focus only on the moving parts, not the inside surfaces, to restore smooth operation.


