
































A well-organized workbench makes projects easier, faster, and safer by keeping tools within reach. Choosing the right storage solutions, such as pegboards, bins, and drawers, helps reduce clutter. With a smart setup, any workspace can become more efficient and practical.
Pegboards for Frequently Used Tools
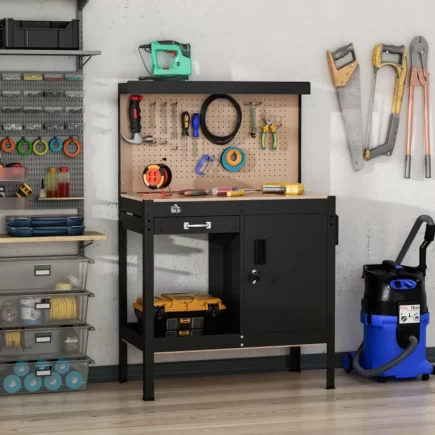
A pegboard is one of the most effective upgrades for any workbench. Mounted above or behind your bench, it keeps frequently used tools visible and within arm’s reach instead of buried in a drawer.
Pegboards are flexible by design. Hooks and holders can be rearranged as your tool collection grows, and everything stays visible at a glance, making it easy to notice when something is missing.
| Pegboard Element | Best Used For |
| Standard hooks | Hammers, pliers, screwdrivers. |
| Bins and baskets | Small hardware, tape, fasteners. |
| Tool holders | Wrenches, clamps, measuring tools. |
Tip: Outline each tool’s shape directly on the board so you know instantly where it belongs and whether it has been returned.
Wall-Mounted Racks and Rails
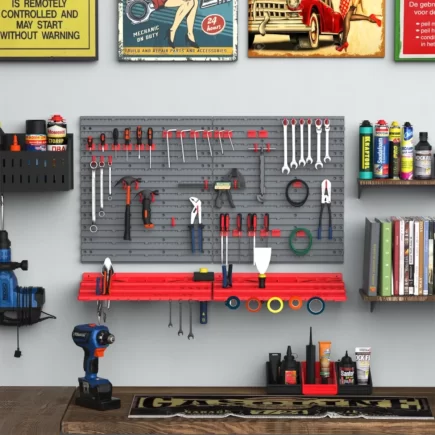
Rail systems and wall racks add another layer of vertical storage beyond what a pegboard can hold. These work well for longer or bulkier items such as clamps, saws, and extension cords.
Most rail systems use a horizontal track with sliding hooks or bins that lock into place, letting you adjust your layout as tools or projects change.
- Choose steel rails for heavier tools like drills or saws.
- Use sliding bins for loose supplies like tape or fasteners.
- Space hooks based on tool size, not just uniform spacing.
Rolling Tool Chests and Drawer Units
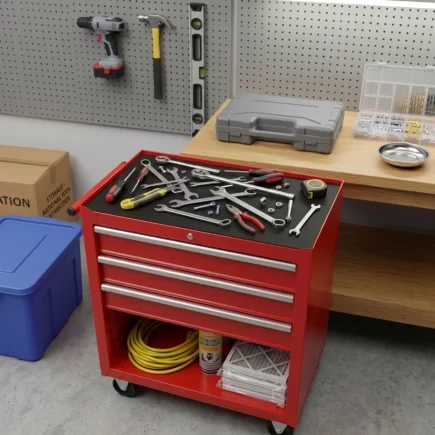
Not every tool belongs on a wall. Rolling tool chests and drawer units are better suited to heavier items, larger tools, and anything you want protected from dust.
Drawers work especially well when organized by category:
- Top drawer: Measuring tools and small hand tools
- Middle drawer: Fasteners and hardware
- Bottom drawer: Power tool attachments and accessories
Helpful tip: Add drawer liners or foam inserts to keep small tools from sliding around every time the drawer opens and closes.
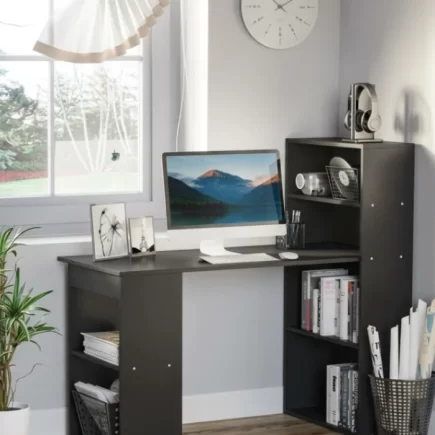
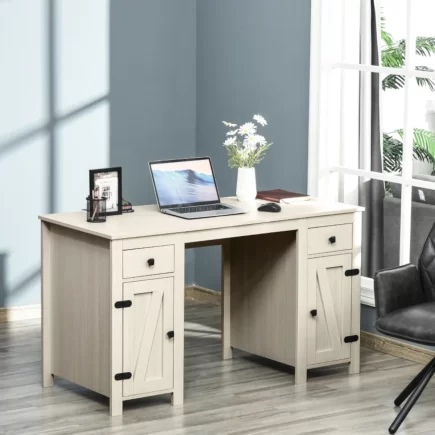
The space-efficient shortcut: Rather than mounting a separate pegboard and buying a standalone drawer unit, a workbench built with both integrated, a peg board section above the surface and drawers below it, gets you vertical tool storage and enclosed parts storage in a single footprint. This is especially useful in a one-car garage or shed corner where floor space for a second storage unit simply isn’t available.
Small Parts Bins and Bolt Organizers
Loose screws, bolts, and washers cause more workbench frustration than almost anything else. Small parts bins with individual compartments solve this by giving every hardware type its own labeled spot.
Stackable bins or a wall-mounted bin rack keep small parts visible without taking up drawer space. Clear plastic bins are particularly useful since contents are visible without opening each one.
| Hardware Type | Recommended Storage |
| Screws and bolts | Compartmentalized bins |
| Nails | Stackable clear containers |
| Washers and small clips | Labeled small-parts organizer |
DIY Shelves and Cubby Systems
Building your own storage is one of the most budget-friendly ways to organize a workbench, and it lets you match the layout to your exact tools. Simple shelves from scrap wood or plywood can be mounted above or below the bench to hold bins and cases.
A few DIY project ideas worth trying:
- Build a plywood shelf above the bench for bins and stacked cases.
- Mount mason jars lid-down under a shelf for small hardware storage.
- Repurpose an old muffin tin or ice tray for sorting screws and bolts.
- Use leftover drawer dividers to create instant cubby compartments.
- Attach a scrap-wood cleat system to hang clamps or cords.
Sizing each cubby or shelf to fit a specific item keeps the system from becoming disorganized over time, since everything has one designated spot.
Vise, Power Strip, and Task Lighting
A well-organized bench is not just about storage. A bench vise mounted at the edge gives you a stable point for cutting, sanding, or clamping without needing a free hand.
- Bench vise: Mount at a corner for the widest range of motion.
- Power strip: Attach under the bench lip to keep cords off the surface.
- Task lighting: Use a clamp-on or under-shelf light aimed at your work area.
Task lighting is often overlooked, but a dim bench leads to mistakes and eye strain. Good lighting solves this without a full rewiring project.
Modular and Expandable Storage
Tool collections grow over time, so a system that can expand is more practical than one built for your current inventory only. Modular pegboard sections, stackable bins, and adjustable rail systems all allow added capacity without redoing the entire setup.
- Choose stackable bins over fixed-size containers.
- Pick pegboard panels that can be added side by side.
- Select rail systems with additional hook and bin attachments available.
Small Garage, Shed, and Corner Layouts
Most workbenches live in shared spaces, not dedicated workshops. A garage corner, a shed wall, or a narrow strip beside a car all require layouts built around limited square footage.
Vertical storage becomes essential in these settings, keeping the floor clear while maximizing usable space above and around the bench.
- Prioritize wall and overhead storage before adding floor units.
- Use slim rail systems instead of bulky shelving in tight spaces.
- Consider a foldable or wall-mounted workbench that tucks away when not in use, or a compact bench with a built-in peg board and drawers so one unit covers surface, vertical, and enclosed storage.
Space-saving tip: In any space under 50 square feet, vertical storage should come before floor storage.
Setups by Hobby Type
Different hobbies call for different workbench priorities. Matching your storage choices to your specific hobby prevents wasted space on features you will not use.
| Hobby Type | Storage Priorities |
| Woodworking | Sturdy vise, clamp storage, dust management |
| Electronics | Small-parts bins, anti-static mats, strong lighting |
| Auto repair | Heavy drawer units, fluid and fastener storage |
| Crafts and hobbies | Small labeled bins, bright clean work surface |
Tailoring your setup this way ensures the tools you reach for most often stay closest at hand.
Safety and Accessibility
An organized bench should also be a safer one. Keep sharp tools, blades, and power tools stored with guards or covers in place, and position anything you use daily at eye level or waist height to avoid unnecessary bending or reaching.
- Store sharp or bladed tools with covers or in closed compartments.
- Keep the most-used tools within easy reach at waist to shoulder height.
- Route cords along walls or bench edges, never across the floor.
- Leave a clear walking path around the bench at all times.
Before and After: What a Reorganized Bench Looks Like
The difference between a cluttered bench and an organized one usually comes down to a few consistent changes rather than a full rebuild. A “before” bench typically has tools piled on the surface, loose hardware in random containers, and no clear zones. An “after” bench has wall-mounted storage doing most of the work, a clear assembly area, and labeled bins for small parts.
Common before-and-after improvements:
- Moving hand tools from a pile on the bench to a labeled pegboard.
- Replacing mixed hardware containers with sorted, labeled bins.
- Clearing the bench surface down to just the current project.
- Adding a rolling chest, or a workbench with integrated drawers, to move bulk tool storage off the floor.
These changes are often achievable in a single weekend, and the visual difference alone tends to reinforce keeping the system maintained.
Choosing the right Workbench can make every project easier to manage and more enjoyable to complete. HOMCOM workbenches offer practical designs that help create a more organised workspace, keeping your tools, materials, and tasks within easy reach for a smoother workflow.
FAQs
The ideal workbench height depends on the type of tasks you perform. Most general-purpose workbenches are around waist height for comfortable standing work. For detailed tasks, a slightly higher surface may provide better control and reduce strain.
Wood, steel, and laminate are common materials used for workbenches. Solid wood offers strength and a traditional feel, while steel frames provide excellent stability for heavy-duty projects. The best choice depends on your workspace needs and the type of work you do.
A workbench’s weight capacity depends on its construction, materials, and design. Heavy-duty models can support large tools and equipment, while lighter versions are suitable for basic DIY tasks. Always check the manufacturer’s weight rating before placing heavy items on it.