


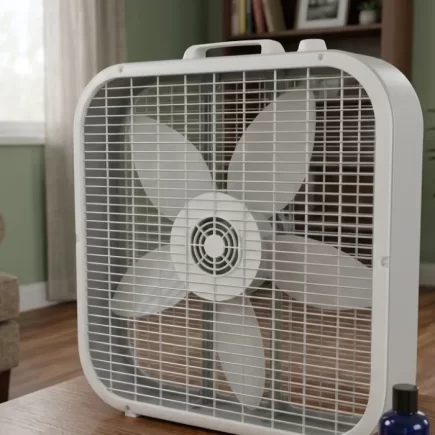





























A box fan collects dust, pet hair and lint as it circulates air, which can reduce airflow and affect performance. Regular cleaning helps remove buildup from the grilles, blades and motor housing. The process is simple and requires only a few basic cleaning tools. This blog explains how to clean a box fan safely and effectively from start to finish.
Tools and Materials You Need
Gather the following tools and materials before taking the fan apart to make the cleaning process easier.
| Tool or Material | Purpose |
| Handheld screwdriver | Removes the screws holding the fan grilles in place. |
| Magnetic tray or small bowl | Keeps screws organised and prevents them from getting lost. |
| Garbage bag | Collects dust, pet hair and lint during cleaning. |
| Used dryer sheets or microfiber cloths | Picks up loose dust, lint and hair from the fan. |
| Baby wipes or damp cloth | Cleans the blades and motor housing. |
| All-purpose or bathroom cleaner | Helps loosen stubborn dirt and grime on the grilles. |
| Scrub brush | Removes built-up grime from grille bars and edges. |
| Vacuum with brush attachment | Removes dust from tight spaces around the motor and housing. |
Safety Steps Before You Start
- Unplug the fan from the wall outlet, and never clean it while it is connected to power.
- Work on a flat, stable surface like a table or the floor so the fan cannot tip over.
- Keep the motor and all electrical parts dry, because water and electricity are a dangerous mix.
- Keep the plug and cord away from water, and set them aside while you wash the grilles.
How Do You Clean a Box Fan?
Step 1: Unplug the Fan and Remove the Back Grille
- Lay the fan flat so it stays steady and the screws are easy to reach around the edge.
- Remove the screws one at a time by hand, and drop each into your tray right away.
- Lift the back grille off once all the screws are out, and set it aside.
Step 2: Remove Loose Dust and Hair
- Rub a used dryer sheet or dry cloth over the grille, because it picks up lint and hair that would clog a drain.
- Wipe the exposed blades the same way to lift off the thick layer of loose dust.
- Drop all the dirt straight into your garbage bag so it does not spread around the room.
Step 3: Remove the Front Grille and Blades if Needed
- Flip the fan over and unscrew the front grille the same way you removed the back one.
- Check each corner for a hidden screw before you pull, since a missed screw can crack the plastic.
- Pull off the control knobs if you want to clean them, as they collect grime from your fingers.
- Wipe the front grille with a dryer sheet to remove the loose dust before washing.
Step 4: Spray and Soak the Grilles
- Carry both grilles to a bathtub or large sink so water and cleaner stay out of your living space.
- Spray cleaner on the front and back of each grille, covering the bars and the corners.
- Let the cleaner sit for a few minutes so it loosens the grime, and wait longer for very dirty grilles.
Step 5: Wash and Scrub the Grilles
- Rinse each grille under running water to wash away the loosened dirt and leftover cleaner.
- Scrub stubborn spots with a brush, focusing on the bars and edges where dust cakes on.
- Rinse again until the water runs clear, which tells you most of the grime is gone.
Step 6: Clean the Fan Blades
- Start at the edges of each blade, because that is where the most dust and grime collect.
- Wipe across both sides of every blade with a damp cloth or baby wipe, using firm, even strokes.
- Add a light spray of cleaner to the cloth, not the blade, only if the dirt will not come off.
- Turn the blades by hand as you work so you can reach every one without missing any.
Step 7: Clean the Motor Housing
- Wipe dust off the motor housing with a dry or slightly damp cloth, since this is the part that wears out when dirt builds up.
- Use a vacuum with a brush attachment to pull dust out of tight gaps that a cloth cannot reach.
- Never spray liquid directly onto the motor, because moisture can damage it or cause a short circuit.
Step 8: Dry Everything Completely
- Wipe the washed grilles with a clean towel to remove most of the water.
- Let all parts air dry until no moisture is left, which may take an hour or more.
- Check the grilles and blades by touch before moving on, because a damp fan can rust or cause electrical problems.
Step 9: Reassemble the Fan
- Place the front grille on first, then set the back grille in position, reversing the order you used to take it apart.
- Put each screw back into its original hole, and tighten them by hand so the grilles sit firmly.
- Stop tightening once a screw feels snug, since forcing it can strip the hole or crack the plastic.
Step 10: Test the Fan
- Plug the fan in and run it on each speed setting to make sure every one works.
- Check that the blades spin freely and do not scrape against the grille.
- Listen for rattling, which often means a loose screw, and look for wobble, which may mean a grille is not seated well.
How Often to Clean a Box Fan
Most households should clean a box fan every 2 to 3 months if it gets regular use. The right schedule depends on how much the fan runs and how dusty the home is.
| Situation | Suggested Frequency |
| Light, occasional use | Every 3 to 4 months |
| Regular daily use | Every 2 to 3 months |
| Homes with pets or many people | Every 2 months |
| Very dusty rooms or heavy use | Once a month |
A quick wipe of the grilles between deep cleans keeps dust from building up.
Common Mistakes to Avoid
- Skipping the dry wipe-down in Step 2, which sends loose dust and hair down the drain and can cause clogs.
- Over-tightening screws, which can strip the holes or crack the plastic frame.
- Soaking or spraying the motor, since water can ruin it or create a safety risk.
- Using aerosol cleaners near the motor, because the spray and propellant can leave residue inside it.
- Reassembling a fan that is still damp, which can lead to rust and electrical trouble.
Regularly cleaning your box fan helps remove dust, pet hair and grime from the grilles, blades and motor housing. By unplugging the fan, cleaning each part carefully and drying everything completely, you can keep it running safely and efficiently. If your current fan is difficult to clean or no longer provides reliable airflow, consider replacing it with a suitable Box Fan from Aosom for everyday cooling.
FAQs
Weak airflow can result from dust buildup, blocked grilles or an obstructed blade area. A dirty filter or surrounding surface can also restrict air movement. Cleaning the fan and checking for obstructions can often improve performance.
Check whether dust, loose screws or an uneven surface is causing vibration or noise. Place the fan on a stable, level surface and make sure its grille and housing are secure. Persistent grinding or rattling may indicate a mechanical problem.
A box fan can improve comfort by moving air around the room, although it does not lower the room’s actual temperature like an air conditioner. Positioning it near an open window can help exchange indoor and outdoor air when conditions are suitable.