



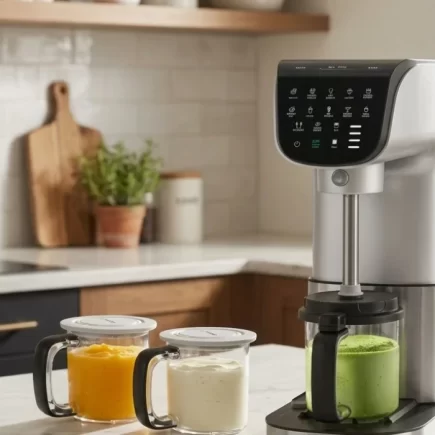






























Homemade ice cream is no longer a slow, fiddly job. With a modern ice cream machine, you freeze your base in a tub, press a preset and enjoy smooth, creamy scoops in minutes. This guide shows you exactly how to get great results from start to finish.
What You Need Before You Start
A little planning goes a long way, as the base needs time in the freezer. Gather these items before you begin.
| What You Need | Purpose |
| Ice cream machine, outer bowl, processing lid and blade | Keeps the machine clean, assembled and ready to process the frozen base. |
| Pint container with lid | Holds the ice cream base while it freezes. Spare tubs are useful for extra flavours. |
| Whisk, mixing jug and measuring spoons | Helps prepare a smooth base with accurate measurements. |
| Full-fat dairy, sugar and flavourings | Provides a creamy texture and adds sweetness and flavour. |
| Level freezer shelf | Helps the base freeze flat for more even processing. |
| Favourite mix-ins | Adds texture and flavour with options such as chocolate chips, nuts or biscuit pieces. |
Step 1: Wash and Check Your Parts
Start with clean, dry equipment so your ice cream tastes fresh and freezes properly. This only takes a couple of minutes, but it prevents icy patches and unwanted flavours. Take a moment to check everything fits together too.
- Wash the tubs, lids and blade in warm, soapy water before first use.
- Rinse well and dry every part completely to avoid icy patches.
- Check the blade is attached securely to the processing lid.
- Place the ice cream machine on a flat, stable worktop near a socket.
Step 2: Make Your Ice Cream Base
The base is the foundation of your ice cream, so it pays to mix it carefully. A smooth, well-dissolved mixture freezes evenly and gives a creamier result. Take your time here and measure accurately.
- Whisk your ingredients until the sugar has fully dissolved.
- Pour the base into the tub, stopping at the MAX fill line.
- Never fill past the line, as the mix expands when processed.
- Seal the tub with its storage lid to keep out freezer odours.
Tip: Sugar and fat keep the texture smooth, so avoid cutting them back too far.
Step 3: Freeze the Base Flat
Your ice cream machine needs a fully frozen base, so patience is key. Freezing the tub flat and solid gives the blade an even surface to work through. Plan ahead and make your base the day before you want to enjoy it.
- Place the tub on a level freezer shelf with the lid on.
- Freeze for at least 24 hours until rock solid.
- Keep your freezer at -18°C or colder for an even freeze.
- Check the surface before use, as a domed top can stop the blade working evenly.
Step 4: Load the Tub into the Machine
Once your base is solid, loading the ice cream machine takes less than a minute. Everything needs to be locked securely in place before it will run. Work carefully, as the blade is sharp.
- Remove the storage lid from the frozen tub and slide it into the outer bowl.
- Place the outer bowl on the machine base, lining it up with the platform.
- Fit the processing lid with the blade attached and lock it into position.
- Check the lock indicator, as the machine will not run unless it is secured.
Step 5: Choose Your Programme and Start
The preset buttons do the hard work for you, taking the guesswork out of every recipe. Simply match the programme to what you are making and press start. The machine stops by itself when the cycle is complete.
- Press the programme that matches your recipe, such as Ice Cream or Sorbet.
- Press Start/Stop and let the blade lower and spin through the base.
- Use Lift/Storage to lower the platform and unlock the tub afterwards.
| Programme | Best For | Texture |
| Ice Cream | Classic cream-based recipes. | Rich and creamy. |
| Lite Ice Cream | Lower-sugar or lower-fat bases. | Lighter and softer. |
| Gelato | Dense, silky Italian-style desserts. | Smooth and dense. |
| Sorbet | Fruit purée and juice bases. | Fresh and fluffy. |
| Frozen Yogurt | Tangy yogurt bases. | Light and tangy. |
| Italian Ice | Sweetened fruit ices. | Fine and icy. |
| Milkshake | Ice cream plus milk. | Thick and drinkable. |
Step 6: Check the Texture and Respin
After the first cycle, take a quick look at your ice cream before serving. Sometimes it can look dry or crumbly, especially if the base was very cold. A simple respin usually brings it back to a creamy finish.
- Look at the surface, which should be smooth, creamy and evenly mixed.
- If it looks dry or crumbly, add a small splash of milk.
- Press Respin to process the tub again until it turns soft and scoopable.
- Repeat only if needed, as too many spins can melt the mix.
Step 7: Add Mix-Ins at the Right Time
Mix-ins turn plain ice cream into something special, but timing matters. They go in after the main spin, so they stay chunky rather than being broken down. A little hole in the centre makes mixing easy.
- Use a spoon to make a hole about 2.5cm wide in the centre.
- Add your mix-ins, keeping the pieces small enough for the blade.
- Press the Mix-in button to blend them evenly through the ice cream.
- Add sauces sparingly, as too much liquid can loosen the texture.
Good mix-in ideas:
- Chocolate chips or crushed nuts: Add crunch and richness.
- Biscuit or brownie pieces: Ideal for a cookies-and-cream style.
- Fruit pieces: Chop small and pat dry to avoid extra moisture.
- Caramel or fudge sauce: Drizzle in lightly for a sticky ribbon.
Step 8: Scoop, Serve and Store
Ice cream is at its softest and creamiest straight after processing. Serve it fresh for the best experience, and save any leftovers for later. A few simple habits will keep them in good condition.
- Serve straight away for the creamiest, softest texture.
- Dip your scoop in warm water for neat, rounded servings.
- Refreeze leftovers in the tub with the lid on.
- Expect leftovers to firm up, so use Respin before serving again.
Step 9: Clean and Store Your Ice Cream Machine
Cleaning is quick if you do it soon after use, while the residue is still soft. Always unplug the machine first and handle the blade with care. Proper drying keeps everything fresh and ready for your next batch.
- Unplug the machine and lower the platform so parts are easy to reach.
- Wash the tub, lids and blade by hand, taking care around the blade.
- Wipe the machine body with a damp cloth and never submerge it in water.
- Dry all parts fully, then store them together so nothing goes missing.
Troubleshooting Common Ice Cream Machine Problems
Even experienced makers hit the odd hiccup. Here is how to fix the most common issues.
| Problem | Likely Cause | Quick Fix |
| Crumbly or powdery result | Base too cold or too little fat. | Add a splash of milk and press Respin. |
| Icy texture | Not enough sugar or fat. | Use full-fat dairy and keep sugar in the recipe. |
| Machine will not start | Lid or tub not locked in place. | Re-seat the tub and lock the lid. |
| Tub will not release | Platform still raised. | Press Lift/Storage to lower it. |
| Uneven texture | Base froze with a domed top. | .Freeze the tub on a level shelf. |
| Mix-ins sticking | Pieces too large. | Chop smaller and use a wider hole. |
Tips for Creamier, Smoother Ice Cream
A few small habits make a big difference every time you use your ice cream machine.
- Use full-fat dairy for a richer, smoother finish.
- Freeze the tub for a full 24 hours so it is solid all the way through.
- Always freeze on a level shelf to avoid patchy texture.
- Add a spoonful of golden syrup to keep the texture soft.
- Freeze spare tubs in advance, so a batch is always ready for guests.
Using an Ice Cream Machine makes it simple to prepare smooth, creamy desserts at home with the right preparation and freezing time. From choosing the right programme to adding mix-ins and storing leftovers, each step helps deliver better results. If you’re ready to make homemade treats more easily, buy now from Aosom and enjoy delicious ice cream whenever you like.
FAQs
Homemade ice cream can become hard because it contains less stabiliser and air than commercial ice cream. Too little sugar or fat can also affect its texture. Let it sit at room temperature for a few minutes before scooping.
Yes, you can make ice cream without cream by using alternatives such as whole milk, yoghurt or plant-based milk. However, lower-fat bases generally produce a lighter and less creamy texture. The recipe may need adjustments to maintain a smooth consistency.
Frozen fruit can be used in some recipes, but it is usually better to follow the machine’s instructions. Large or very hard pieces may affect the mixing process. Chopped or slightly softened fruit is often easier to incorporate smoothly.