


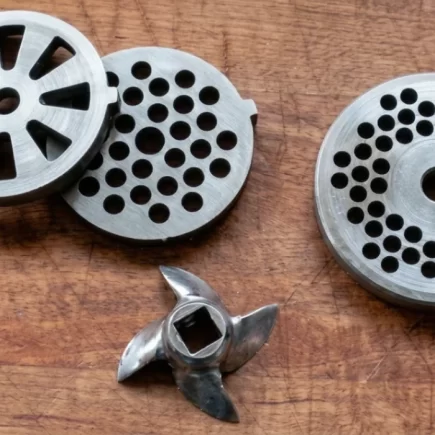

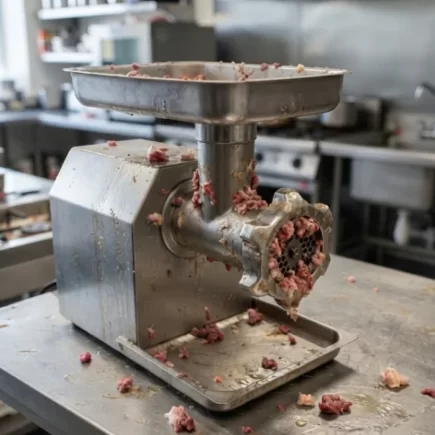




















A meat grinder plate and knife need smooth, even contact to cut meat cleanly and produce consistent results. With regular use, their working surfaces can become worn or uneven, causing meat to tear, smear or pass through less effectively.
Before replacing these parts, it is worth checking whether the surfaces can be restored through proper lapping. This blog explains how to sharpen a meat grinder plate and knife at home using simple tools and a flat surface.
Why Do Meat Grinder Plates and Knives Get Dull?
The knife and plate work together every time you grind meat. The rotating knife needs to sit closely against the plate so it can shear the meat as it passes through the holes.
Over time, the contact surfaces can become worn or uneven. When this happens:
- The knife may not sit flush against the plate.
- Meat can be torn rather than cleanly sheared.
- Fat may smear across the plate instead of passing through cleanly.
- The grinder may require more effort to process the same amount of meat.
- Ground meat can have a less consistent texture.
Resurfacing the mating faces can restore better contact between the two components. However, badly damaged, cracked or heavily worn parts may be better replaced than resurfaced.
What You Need
Before starting, prepare the right tools and materials to ensure the plate and knife can be resurfaced evenly. The most important item is a genuinely flat, rigid surface that provides a consistent reference while sanding.
| Tool or Material | Purpose |
| 80-grit wet/dry sandpaper | Removes uneven material from worn surfaces. |
| 180-grit wet/dry sandpaper | Smooths the surface after coarse sanding. |
| Water | Keeps the wet/dry sandpaper lubricated during sanding. |
| Permanent marker | Shows areas that have not been evenly sanded. |
| Flat lapping surface | Provides a stable, level surface for resurfacing the plate and knife. |
The flat surface is the most important part of the setup. Sanding on a surface that is uneven can produce an uneven plate or knife rather than correcting the problem.
Before You Start
Disconnect the grinder from power and remove the plate and knife according to the manufacturer’s instructions. Clean away any meat, fat or residue before inspecting the parts. Check both components for cracks, deep damage, severe corrosion or excessive wear. Do not attempt to restore a damaged part simply by sanding it.
It is also useful to note the original orientation of the knife before removing it. Some grinder knives have a specific installation orientation, so follow the manufacturer’s instructions when putting everything back together.
How to Sharpen a Meat Grinder Plate
Technically, you are lapping or resurfacing the plate, rather than sharpening it in the conventional sense. The objective is to create a flat, even surface for the knife to contact.
Step 1: Mark the Plate
Use a permanent marker to draw a series of crossing lines across the entire working face of the plate. These lines act as a visual guide. As you sand, the marker will disappear from the areas making contact with the sandpaper.
Do not move to the next stage simply because most of the marker has disappeared. Continue until the working surface shows consistent contact and no obvious untouched areas remain.
Step 2: Start With 80-Grit Sandpaper
Place the 80-grit wet/dry sandpaper on your flat lapping surface and add a small amount of water. Place the marked face of the grinder plate against the sandpaper.
For a consistent sanding pattern:
- Position the plate with its locating notch at approximately the 12 o’clock position.
- Move the plate forward and backward 10 times using steady pressure.
- Rotate the plate slightly to approximately the 1 o’clock position.
- Repeat another 10 strokes.
- Return the notch to the 12 o’clock position and make another 10 strokes.
- Turn the plate 180 degrees.
- Repeat the same three positions and stroke counts.
This gives you six sets of 10 strokes, or 60 strokes in total.
The exact stroke count is less important than maintaining consistent pressure and periodically checking the surface. Heavily worn parts may require additional passes.
Step 3: Check the Marker
Lift the plate and inspect the working face. Look for areas where the permanent marker is still visible. These untouched areas indicate that the sandpaper has not yet contacted the surface evenly. If significant marker remains, wet the paper again and repeat the sanding pattern.
Continue checking rather than removing unnecessary material simply to reach a predetermined number of strokes.
Step 4: Repeat on the Other Face
Turn the plate over and mark the opposite face with the same crosshatch pattern. Repeat the 80-grit sanding process until the surface has been evenly lapped.
Keep the pressure controlled and avoid rocking the plate while sanding. The goal is a flat surface, not simply a polished-looking one.
Step 5: Finish With 180-Grit Sandpaper
- Replace the 80-grit paper with 180-grit wet/dry sandpaper.
- Wet the paper lightly and repeat the same sanding pattern on both sides of the plate.
- The finer abrasive removes the deeper marks left by the coarse paper and produces a smoother mating surface.
For routine maintenance, a lighter resurfacing with the finer grit may be sufficient when the parts are only slightly worn. More heavily worn parts generally require more work with the coarse grit before finishing.
How to Flatten a Meat Grinder Knife
The grinder knife is treated slightly differently from a conventional kitchen knife.
You are not creating a new bevel or sharpening the cutting edge with a sharpening stone. Instead, the relevant flat face of the knife is resurfaced so it can sit closely against the grinder plate.
Step 1: Prepare the Knife
Place the 80-grit wet/dry sandpaper on the same flat lapping surface and add a small amount of water.
Before sanding, identify which face of the knife needs to remain flat against the plate. If you are unsure about the correct orientation, check the grinder manufacturer’s instructions.
Step 2: Sand the Knife
Place the appropriate face of the knife against the wet sandpaper.
Use the same controlled rotation pattern:
- Make 10 forward-and-back strokes.
- Rotate the knife slightly and make another 10 strokes.
- Return to the starting position and make another 10 strokes.
- Turn the knife 180 degrees.
- Repeat the three-position sequence.
Use even pressure throughout the process. Avoid rocking the knife from side to side because that can produce an uneven contact surface.
Step 3: Check the Surface
Inspect the knife for remaining marker lines and areas that have not contacted the sandpaper. If necessary, repeat the 80-grit process until the relevant face is being contacted evenly.
Avoid removing more material than necessary. The purpose is to restore a flat mating surface, not to significantly reduce the thickness of the knife.
Step 4: Finish Blade With 180-Grit Sandpaper
Repeat the same process with 180-grit wet/dry sandpaper. This creates a smoother contact surface and removes some of the deeper scratches produced by the coarse abrasive.
How to Check the Plate and Knife
After resurfacing, clean both components thoroughly and inspect the contact surfaces.
A simple contact test can help you see whether the knife and plate are meeting evenly. You can apply a light marker pattern to the relevant surface and make a controlled contact check, looking for consistent contact rather than isolated high spots.
A paper test can also provide a basic indication of cutting contact:
- Place a thin piece of paper over a plate hole.
- Rotate the knife across the plate in its normal direction.
- Check whether the knife cuts the paper cleanly or tends to drag and tear it.
The paper test is only a practical check, not a definitive measurement of grinder performance. The real test is how consistently the grinder processes properly chilled meat after the components have been cleaned, assembled and correctly installed.
How Often Should You Resurface a Meat Grinder Plate and Knife?
There is no fixed sharpening schedule because wear depends on how frequently you grind, the type of meat being processed and how the grinder is maintained.
You generally do not need to resurface the parts every time you use the grinder.
Instead, inspect the plate and knife when you notice changes such as:
- Meat becoming more torn or smeared.
- Fat being pushed or smeared instead of cleanly cut.
- Less consistent grinding.
- The grinder struggling more than usual.
- Visible uneven wear on the contact surfaces.
For lightly worn parts, a fine-grit finishing pass may be enough. If the surfaces have developed noticeable unevenness, start with the coarser abrasive and finish with the finer grit.
Common Mistakes to Avoid
- Using an Uneven Surface: Avoid sanding on flexible, bowed, or uneven surfaces; use a genuinely flat reference surface.
- Skipping the Marker Test: Use marker lines to identify areas that have not made proper contact with the abrasive.
- Applying Uneven Pressure: Apply controlled, consistent pressure to prevent removing more material from one side.
- Sanding Without Water: Use water with wet/dry sandpaper to help control sanding and clear debris.
- Removing Too Much Material: Stop once the surface is evenly resurfaced and avoid unnecessarily changing component dimensions.
- Reassembling Without Cleaning: Wash away abrasive residue and metal particles, dry the parts thoroughly, and reassemble according to the manufacturer’s instructions.
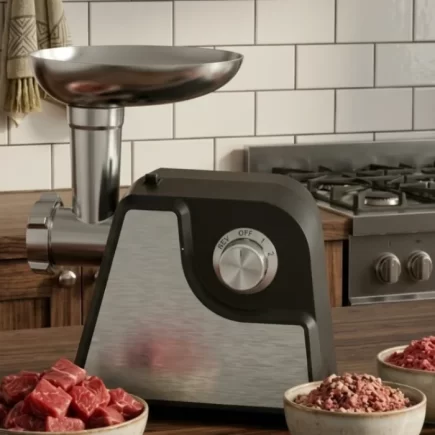
Choosing the right Meat Grinder is important because its performance depends on how well the plate and knife work together. With Aosom, choosing a suitable grinder with properly aligned, durable components can help support consistent grinding performance. Keeping the plate and knife flat, clean and correctly installed can also help maintain reliable results over time.
FAQs
Standard electric home meat grinders cannot process hard bones and burn out motors. Heavy commercial-grade units can safely crush softer poultry pieces like chicken necks. Always check user manual specifications before attempting any bone grinding at home.
Beef chuck roast remains the top choice because of its ideal fat-to-lean composition. You can blend it with rich brisket or short ribs to craft flavorful gourmet burgers. Keep raw meat cubes semi-frozen beforehand to prevent fat smearing in the grinder.
Disassemble every metal component right after use and wash with warm soapy water. Towel dry every single part thoroughly to guard all metal against rapid oxidation. Coat the cutting knife and grinding plates in food-safe mineral oil before storage.