


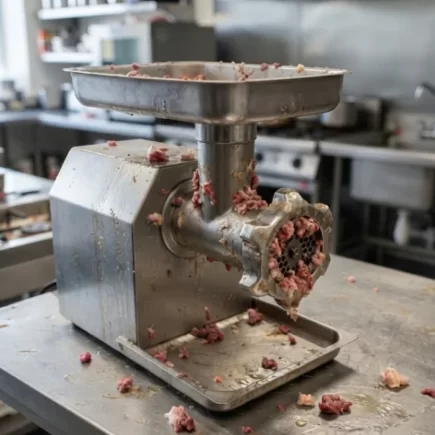

























Cleaning a meat grinder after use is essential for removing meat, fat and residue before they build up on its components. Regular cleaning helps maintain hygiene, protect the grinder from corrosion and support consistent performance. This blog explains how to clean each part properly and prepare the grinder for its next use.
What You’ll Need
Gather your cleaning supplies before taking the grinder apart:
- Hot water and washing-up liquid.
- A dedicated stiff cleaning brush.
- A soft sponge or cloth.
- A sink strainer.
- A clean, dry towel.
- Food-grade mineral oil, if recommended for your grinder.
| Cleaning Item | Main Purpose |
| Hot soapy water | Loosens grease, fat and food residue. |
| Stiff cleaning brush | Cleans the auger, shaft, plate and other surfaces. |
| Soft sponge or cloth | Reaches smaller areas and protects delicate surfaces. |
| Sink strainer | Prevents food scraps from entering the drain. |
| Clean towel | Removes moisture after washing. |
| Food-grade mineral oil | Helps protect suitable metal parts during storage. |
Step 1: Remove Leftover Meat
- Start by switching off and unplugging the grinder.
- Remove any remaining meat from the feed area and outlet before disassembly.
- Collect larger scraps rather than washing them into the sink, as they can contribute to blocked drains. If the meat is still suitable for use, handle and store it according to normal food-safety practices.
Step 2: Disassemble the Grinder
- Follow the manufacturer’s instructions to remove the removable components. Depending on the model, this may include the hopper, feed components, auger, grinding plate, blade and retaining ring.
- Remove excess meat from each component as you go. Keeping the parts organised makes cleaning and reassembly easier.
Important: Do not immerse the motor housing or any electrical components in water. Clean these areas according to the manufacturer’s instructions.
Step 3: Rinse the Removable Parts
- Rinse the removable components with warm water to loosen meat and fat before scrubbing.
- Pay particular attention to the grinding plate, as small pieces of meat can become lodged inside its holes. Run water through the openings and use a suitable brush to remove stubborn residue.
- Place a sink strainer over the drain to catch food particles instead of allowing them to enter the plumbing.
Step 4: Clean the Grinding Plate
- The grinding plate usually requires extra attention because residue can become compressed inside the holes.
- Hold the plate securely and rinse through each opening.
- Use a stiff brush to work out any remaining meat or fat without damaging the surface.
- Check both sides of the plate before moving on. Make sure all visible residue has been removed.
Step 5: Wash the Blade and Auger
- Clean the blade carefully, paying attention to the cutting edges and areas where meat or connective tissue may have collected.
- Next, scrub the auger along its entire length. Check around the shaft and other areas where ground meat can accumulate.
- Use a brush rather than your fingers around sharp components, and handle the blade carefully to avoid cuts.
Step 6: Scrub the Feed Area and Threads
- The feed throat, neck and threaded sections can collect small amounts of meat and fat that are easy to overlook.
- Use a dedicated brush or soft sponge to clean these areas thoroughly. Work around the grooves and internal surfaces until no visible residue remains.
- Take extra care around seals, bearings and other components that should not be soaked or aggressively scrubbed. Follow the grinder manufacturer’s cleaning instructions for these areas.
Step 7: Wash the Parts in Hot Soapy Water
- Once the loose residue has been removed, wash the compatible removable components in hot, soapy water.
- Use the stiff brush for larger surfaces and grooves, then use a sponge or cloth for smaller areas. Pay attention to joints, threads, corners and openings where residue may remain.
- Do not rely on rinsing alone. Scrubbing is important for removing the thin layer of fat and food residue left behind after grinding.
Step 8: Rinse and Dry Thoroughly
- Rinse the cleaned components with clean water to remove soap and loosened debris.
- Shake off excess water and place the parts on a clean drying rack or towel. Allow them to dry completely before reassembly.
- Drying is especially important for metal components because leaving them wet for extended periods can encourage corrosion or other surface problems.
- For the motor housing and other non-removable areas, wipe the exterior with a suitable damp cloth and then dry it thoroughly. Never allow water to enter electrical components.
Step 9: Inspect the Parts Before Reassembly
Before putting the grinder back together, inspect each component.
Check the grinding plate holes, blade, auger, threads and feed area for any remaining meat or grease. Also look for signs of wear, damage or corrosion. If a component appears damaged or excessively worn, consult the manufacturer’s instructions before using the grinder again.
Step 10: Reassemble the Grinder
Once all parts are completely clean and dry, reassemble the grinder in the correct order. Make sure the blade, grinding plate and retaining components are positioned correctly. Incorrect assembly can affect grinding performance and may create unnecessary wear.
Wipe the exterior housing with a clean, dry cloth before storing the machine.
Optional: Apply Food-Grade Mineral Oil
Some commercial meat grinders require light oiling of suitable metal components after cleaning, particularly when the machine will be stored for a period.
If your manufacturer’s instructions permit it, apply a very thin layer of food-grade mineral oil to the appropriate metal surfaces. Use only an oil specifically suitable for food-contact equipment and avoid applying it to components where lubrication is not recommended.
Tips for Easier Meat Grinder Cleanup
- Clean immediately: Washing the grinder soon after use prevents meat and fat from drying onto the components.
- Catch food scraps: Use a sink strainer to prevent meat particles from entering the drain.
- Clean every surface: Check threads, grooves, holes and corners rather than focusing only on the main components.
- Handle the blade carefully: Use a brush or cloth around sharp edges instead of your fingers.
- Keep electrical parts dry: Never immerse the motor housing or other electrical components.
- Dry completely: Make sure all washable parts are fully dry before storage or reassembly.
- Follow the manual: Cleaning and lubrication requirements can vary between commercial grinder models.
Choosing the right Meat Grinder also means considering how easy it is to clean and maintain after use. A grinder with accessible, removable components can make it easier to remove meat, fat and residue thoroughly. Easy cleaning, proper drying and straightforward reassembly can support hygienic use and long-term performance.
FAQs
A meat grinder can process beef, pork, lamb, chicken, turkey and other boneless meats for burgers, mince and sausages. With the right plates and attachments, many models also grind vegetables, soft cheeses, breadcrumbs and sausage mixtures per manufacturer instructions.
You should not grind fully frozen meat. Grinders work best with very cold, firm meat that is not rock-solid. Partially frozen meat (30-60 mins in freezer) grinds cleanly and avoids smearing, while fully frozen chunks can dull blades, strain the motor and cause jams.
Clogging usually happens when meat is too warm, fatty or sinewy, or pieces are too large. Warm fat smears and blocks the plate. Prevent it by well-chilling meat and parts, trimming silver skin and tendons, cutting into 1-inch cubes and feeding slowly without forcing.